
WooCommerce is a powerful WordPress plugin that allows you to build a robust e-commerce store. We have built many custom WooCommerce stores for clients, and during those projects have had many requests for custom features to extend the core functionality of WooCommerce.
Some of those WooCommerce plugin development projects have included a custom order exporter, creating and sending purchase orders from within the WordPress admin, and custom printable invoices.
In this how-to, I’ll be showing you how to build a WooCommerce stock report to csv exporter. After getting familiar with the process, you will be able to develop your own types of custom WooCommerce reports.
1. Create the WooCommerce Stock Report Page
The first step of the stock report plugin is to create a page in the WordPress admin to interact with. The code for creating a top level menu page called “Stock Report” is below.
We hook into the WordPress admin_menu action and call our function endo_stock_report_admin_menu. In this function we call the WordPress function add_menu_page to create our own top level menu. If you wanted the menu to be a submenu of WooCommerce instead, you could use the add_submenu_page function.
2. Add Export Functionality Trigger
Now that we have a custom admin page, let’s add our export functionality trigger. Since we want the stock report of all current products, there are no need for any options. It’s simply a snapshot of the state of inventory in the WooCommerce store at the current time.
This is what our admin page will look like.
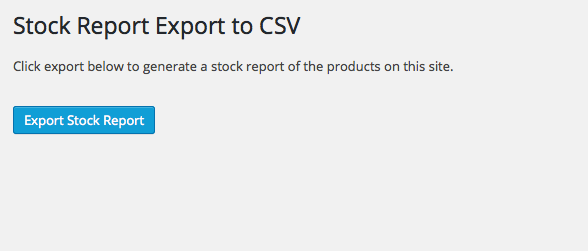
The code below will generate our admin page content with an export button that the user can use to trigger the stock report export any time they want.
3. Check for Form Submission
Using the WordPress admin_init hook, we can run our endo_stock_report_admin_init function to see if the form on our export page was submitted. The code for that functionality is below.
First we get the global $plugin_page variable. This allows us to make sure the correct page was submitted. We also check to make sure the export submit button value is set, since we gave it a name of download_csv.
If both of these conditions are met, then we run the generate_stock_report_csv function. Since we will be outputting a csv file, we die after the function. If we didn’t die at this point, the remainder of the page output would also be added to the csv file.
4. Generate Stock Report CSV
The generate_stock_report_csv function is responsible for creating a csv file and adding the product data we specify to each row of the file. The full code for the function is below.
The first step is to the set the header for content type to text/csv so that the file is downloaded instead of displayed.
Next we set the headings for the csv file in the $headings array. These will be output to the first row of the csv file. In this report, we only need the Product Name and Stock. In your own reports, you can set these values to whatever you need them to be.
Then we set another header for the content disposition. It is here we set the name of the file. In this example, we use “endo-stock-report-“, with the current date appended to the end.
Next we use the fopen function to create a file pointer that is connected to the output stream. Then we output the column headings using fputcsv, passing it our file pointer and headings array.
Simple Products
The next section of code is a WP_Query that looks for simple products where manage stock is set to yes. If any products are found, it loops through them. During the loop, an array called $row is created that includes the product’s title and stock value. This array is then written to the csv using fputcsv.
Products With Variations
If your store uses any product variations, then you will need another WP_Query to retrieve them from the database. For each product that is found, use the WC_Product_Variation class and pass it the current product variation’s ID to retrieve the data needed for the csv file.
Here is the plugin code in it’s entirety.
Conclusion
You can build upon this basic export functionality to create any type of custom report that you need for your WooCommerce store. For example, you could create custom order reports, sales reports, or shipping reports with the specific information you need for your business.
Using basic WordPress functionality, it is easy to create your own custom WooCommerce plugin. WooCommerce has many helpful functions and methods that allow you to access and alter store data from within your plugin. Be sure to explore the WooCommerce API Docs to see what other actions, filters, and functions are available.
Need Help?
If you need help with WooCommerce plugin development for your next project, contact us today!

Nice! I love the use of fputscsv, although there are some things that I’ve learned it doesn’t handle very nicely. I had a client who I built a CSV exporter for (for custom data with unknown characters) and some of the exported data was UTF-8 (in accordance with the default WordPress charset). If you run into that situation, you have to do some very interesting things to make the CSV export open up correctly in Microsoft Excel (the default application for this stuff) across all platforms.
At first I tried using the UTF-8 BOE, but (believe it or not) the last major version of Excel for Mac that most people use (prior to the Office 365 stuff) doesn’t honor that! You have to use a crazy combination of an output header with UTF-16LE, mb_convert_encoding, and a custom delimiter (tabs instead of commas, with appropriate escaping of content).
CSV export is great, but can get really tricky as soon as you’re exporting non-ASCII characters or data that needs to be escaped (with newlines or commas)!
Thanks for the feedback Nick! Good to know about the unknown characters issue. I’ll keep that in mind for future projects.
Great source here. I got it to work, just want to know what tag would I use to IMPLEMENT product sizes? (S, M, L, XL, 2XL, 3XL, 4XL) they are in the variations.
Hi Charles,
You could alter the product variation loop to look like this:
$product = new WC_Product_Variation( $loop->post->ID ); $variation = wc_get_product( $product->variation_id ); $var_attr = $variation->get_variation_attributes(); foreach( $var_attr as $key => $value ) { $row = array( $product->get_title() . ', ' . $var_attr[$key], $product->stock ); } fputcsv($output, $row);Hi Jeremy,
realy greate code. This is something that is missing at woo.
May you can help easly with this problem:I need “cost of good” also in the list.*
So an customize field…
I´m using the eagleeyeprofittracker to add the “cost of goods” to every product.
They write something “$cost_of_pr = get_post_meta($product_id, ‘_fp_eept_cost’, true);” in their code…
Many many many Thanks.
Best Henrik
Thanks for this code snippet. I used this to create an Order Report exporter, outputting all of my pending orders with customer billing and shipping info.
Just an FYI, in your example above a WP error kicks out because user levels are deprecated. The Step 1 line should be:
add_menu_page(‘Export Reports’, ‘Export Reports’, ‘manage_options’, ‘hgf_order_report’, ‘hgf_admin_order_report_page’);
The ’10’ should be ‘manage_options’ to depict user with administration capability.
Aleks – would you consider contributing back? I need an Order report exporter w/Shipping info for sales tax software import.